SUI Tutorial
The SUI tutorial is the quickest way to learn using SUI. By example, the
tutorial goes through some of the most common aspects of using SUI. This gives the
user a reference for rendering their own data.
The bottom line is experience with
StarSplatter is a big plus for using SUI, because there is so much information I could
not make extensive documentation covering every detail. If you are having trouble, you
should familiarize yourself with the StarSplatter documentation, and definitely read
through the SUI manual. The manual describes what each part of the UI does, which is something
I tried to avoid while writing the tutorial. It would be good to use the manual as a reference
while doing the tutorial.
Tutorial
1. Run SUI.
2. Go to the Project menu entry field.
3. Type "./tutorial/tutorial.sui" in the entry field.
4. Go to the Project menu, and select Open Project. If a file not found error occurs, make sure you have the tutorial directory in the specified path. If not, move it, or type the right path in the entry field.
5. The tutorial project should now be loaded.
6. Go to the Data Menu.
7. Select Load from the data menu. If a file not found error occurs, make sure you have
the path to TUTORIAL_DATA000 correct. It will be wrong if you had to change the path for the tutorial.sui file. Both files are by default in ./tutorial.
8. Press the preview button. After the rendering takes place you should see this image in
the preview window.
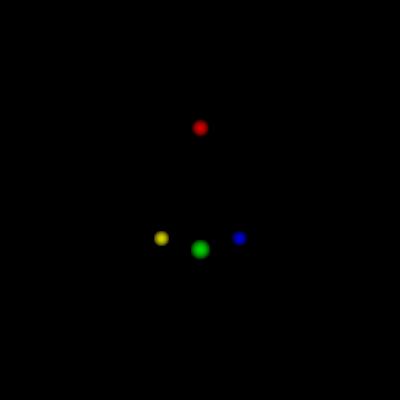
This image is generated by the dubinski file TUTORIAL_DATA000. The file contains four particles, each
in their own group, which
should appear red, blue, yellow, and green. Each group of particles is described by a star
bunch. These bunches appear by name(which is the same as the color of the particles.)
9. Select the $blue star bunch from the list in the star bunch section of the UI, and then press
Edit. This will load all of the values associate with the star bunch into the fields below
.
10. Change the color of the $blue bunch by adjusting the values in the Color field. The format
is R G B Opacity all floating point numbers.
A small change can make a big difference, so make small changes to start
with. When you are done, press the save button.(note: DO NOT CHANGE THE NAME OF THE STAR BUNCH.
if the name is changed, then you will not be able to save it in place of $blue, but will
instead have to add it with the + sign, and that is not yet part of what is being demonstrated.
11. Once your changes are saved, hit the preview button again. The blue particle, should now be
whatever color you assigned to it.
12. Go to the actions menu. The arrow pointing right is for movement. The double ended arrow in an
arch is for panning, and the arrow in a circle is for rotating. The movement entry field should
have 0.0 120.0 0.0 in it. Change the 120.0 to 60.0, and then hit the movement button. After this
is done hit the preview button. The image should appear as though you have moved closer to
the particles. Change the 60.0 back to 120.0 and hit the movement button again. Then hit
preview to refresh.
13. If you want to experiment, try changing the values in the other fields. After you make a
change, hit the Action button associated with it on the left, and then hit Preview to see
how the changes look.
14. If you want to do two or more actions at once, check the Tie buttons to the right of the
Action entry
fields. The top check button ties moving and panning, the middle one ties moving and rotating,
and the bottom one ties panning and rotating. When actions are tied together, you only have to
hit one of the action buttons associated with the tied actions to perform the action. All three
actions can be tied together.
15. When you are done, continue to the next step. If at any time you feel you have altered
something or are lost, just close SUI and re-open the tutorial.sui.
16. Its time to make an animation. Check the record button.
17. Go to the rotation field in the Actions section. type "360.0 z" into the rotation field,
and hit the Action button for it.
18. After doing this the Movie button on the toolbar should now be enabled.
19. Open the movie menu, and select "Make Script".
20. After this, select, "Save Script". Save Script will save the movie script with the name
that appears in the entry field to its right, concatenated with .tcl.
21. Now copy the tutorial.tcl script and the file TUTORIAL_DATA000 into an empty directory. Any one will
do, even make a temp
one to throw away afterward.
22. Enter the directory and execute the command: "starsplatter tutorial.tcl".
23. This will generate a sequence of 100 frames named FRAME0000.tiff to FRAME0099.tiff. If
encoded as a movie these frames will be an animation of rotating the TUTORIAL_DATA000 model 360
degrees.
24. Go back to SUI. To save the image that is currently in the preview window, go to the
Image menu. Select Save Image, and the image will be save with the name that is in the
entry field to its right, concatenated with ".pnm"
25. I don't have any good way to demonstrate making a move with time progression of a model,
but it is explained as best as I could in the manual
.
All documentation, code, and media on this site (c) Sean Maxwell 2002 unless otherwise stated.