Operating the Telescope and Dome
When you arrive, remember that many things have been unplugged as part of
lightning prevention. You will need to reconnect them. Go to the
weather and lightning page to see the list.
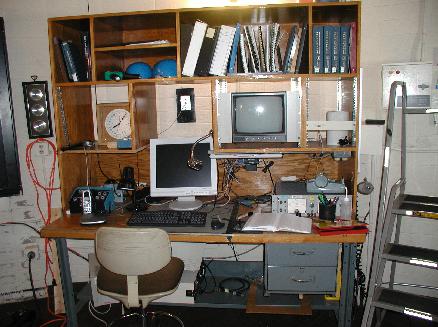
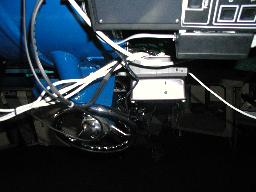
The primary control area on the dome floor. From left to
right, the important features are:
- Temperature and humidity gauges (on the wall),
- Sidereal clock,
- The focus control, which is below the sideral clock, and behind the portable telephone,
- the computer display,
- the telescope guider display,
- and the dome rotation control on the right wall.
Turning On the Telescope
- FIRST, ensure that it is safe to move the telescope.
This means that at a minimum:
- all portable stairs are stowed,
- the liquid nitrogen fill tube to the CCD dewar is disconnected from CCD
dewar,
- the RA quick motion clamps are on,
- the telescope support tripod (used during engineering work) is not
in place.
- the RA quick motion switches are in the clamp position
- Telescope power is turned on via a key on the wall at the top off the
circular stairs (next to the whiteboard). When you turn telescope power on,
you should
hear a buzzing noise. This is the telescope shutter unit
powering up, and the shutter moving in each direction. The RA and dec
preloads will also come on; you can verify this by checking the
red light on the preload rack at the bottom of the circular stairway.
If the preloads aren't on, flip the toggle switch on the back of the
(upper) preload rack.
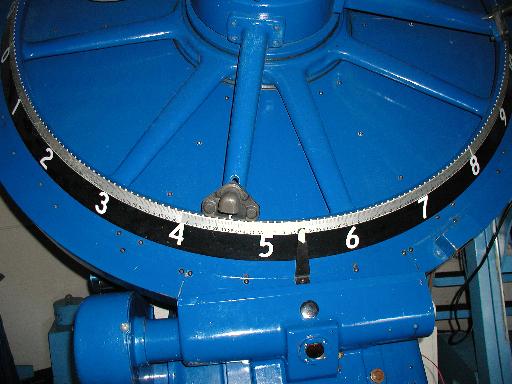
The Right Ascension circle, placed on the telescope pier. It is
set by moving the inner blue radial spokes clockwise or counter-clockwise.
- Move the telescope to zenith, then turn on the sidereal drive motor.
- Set the Right Ascension setting circle so it reads the correct LST.
(Use the LST clock or run skycalc on one of the Linux machines)
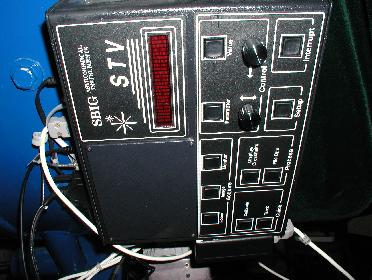
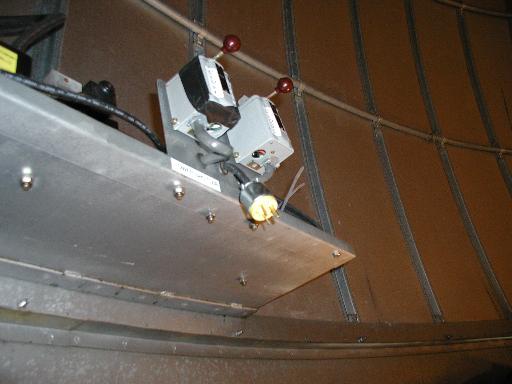
The telescope guider box. The power switch is on the top of this
image
- The guider box should come on automatically; if not, turn it on via the switch
on the side of the guider box.
- Turn on the guider and finder cameras.
The filter interface power supply. The white reset button is near the
center of this image.
- Reset the shutter and filter-wheel logic by pressing the white "STD
reset" button on the the filter interface power supply box attached to
the CCD mount. Move the filter wheel via the computer to ensure that the
LED's turn off. (see Section 4 for how to change filters)
The clamshell wheel in the open position. If the clamshell is
open, the blue piston attached to it is closest to the rear of
the telescope.
- Ascertain that the lower clam shell is open (large wheel near the
telescope base).
To Open the Dome
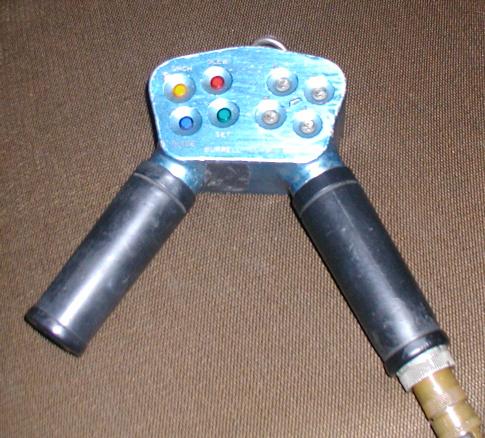
The Burrell Schmidt handpaddle. On the right are the North,
South, East and West buttons. On the left are the four slewing
modes. In order from fastest to slowest, they are slew (red),
search (yellow), set (green), guide (blue). The dome rotation
buttons are at the top of the handpaddle, near the hanging hook.
- Using the hand-paddle, position the dome to due E if it is pointing elsewhere.
The dome control outlet. The upper shutter control is on the
right, and the lower control is on the left.
- Using the ladder, carefully plug in the cord to the outlet marked
"shutter".
- Flip the rightmost switch to the right to open the upper shutter.
If nothing happens, reach on top of the switch, and
slide the bar to the right.
- Once the upper shutter has risen a few feet, open the lower shutter by
flipping the leftmost switch to the right.
- The lower shutter is open when the sound changes abruptly; turn the
leftmost switch off.
- Once the shutters have stopped moving, turn the switches off, and
unplug and coil the cable.
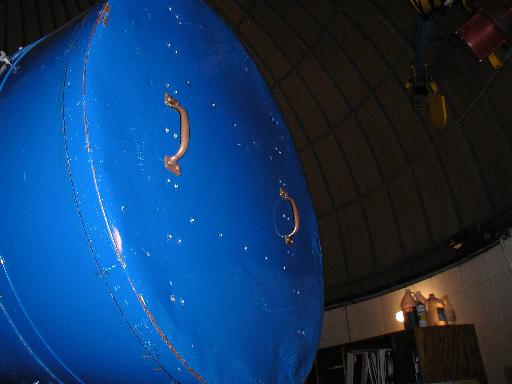
The "garbage can" lid of the telescope.
- Uncover the telescope, taking care not to scratch the corrector!
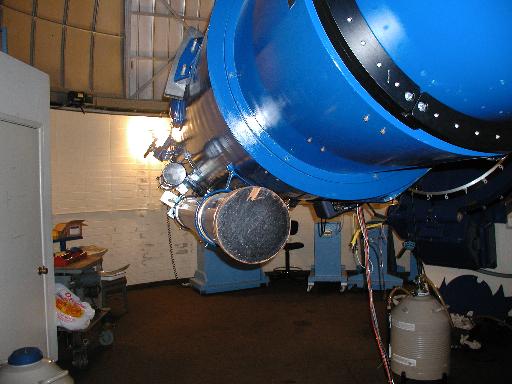
A view down the side of the telescope. The guider is visible as
the larger telescope, and the finder telescope is visible above it.
The finder is now rarely used. (Bah! I disagree -- it's the
fastest way to check pointing! --Chris)
- Uncover the guider and finder telescopes.
- Turn on the computer monitor and the guiding monitor at the
primary control area.
You should now be ready to observe!
To Move the Telescope
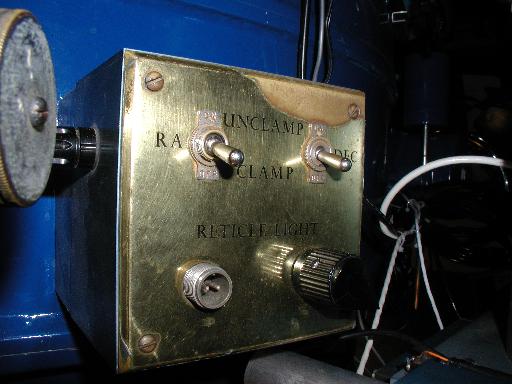
One of the two telescope clamp controls. Both clamps are locked
when the switch is down.
The telescope is usually moved to its new position by unclamping the
telescope in one axis, maneuvering by hand until approximately correct, and
then repeating the operation for the opposite axis. However, if the
telescope is in an awkward position, we recommend that you instead move the
telescope using the "slew" (red button)
setting on the hand-paddle rather than attempt
to deal with the situation perched on a ladder. The final adjustment of the
telescope position should be done with the hand-paddle in either case.
NEVER OPEN BOTH RA AND DEC CLAMPS AT THE SAME TIME.
Do not use the clamps to decelerate the telescope, unless
its the only way to stop the telescope safely.
- Unclamp the telescope in one axis only using either pair of switches
(located on opposite sides of the telescope).
- Grab the telescope using one of the large clamshell wheels (not the
finder or guide telescopes!) and carefully maneuver the telescope to
its new position.
- After the telescope has stopped moving, reclamp the telescope (must
be done with same switch).
- Repeat the operation for the other axis.
- Move the telescope to the final position using the hand-paddle.
Although the Schmidt is reasonably well-balanced, the inertia
is considerable. Generally, it is best to move the telescope slowly
and smoothly. Low-mass individuals should be extra careful.
NEVER, EVER TAKE THE TELESCOPE TUBE BELOW HORIZONTAL!! SOME OF
THE OPTICS ARE HELD IN BY GRAVITY, AND CAN FALL OUT!
NOTE: If the telescope does get away from you, you can reclamp it by simply
TURNING OFF THE KEY.
Gotcha: If you hear the "click" of the relays when you flip the brake switches,
but you cannot move the telescope, you probably do not have the airpressure
to release/engage the brakes. Make sure the breaker for the aircompressor
is on downstairs.
Reading the Setting Circles
Both the RA and Dec setting circles are equipped with verniers. With care,
the practiced observer can set the telescope to 10s in RA and 5 arcmin in
declination. Examples of how to read the verniers are given in Figs. 1 and 2.
Figure 1:
The RA vernier is read by obtaining the hours and minutes from
the "0" mark (16:00 here) and reading the number of seconds based upon
where the marks on the two scales line up from the top scale (30s in this
example). Thus the telescope is pointing to an RA of 16h 00m 30s, if the
circle was set to the correct LST at the start of the evening.
Figure 2: The dec vernier is read by first obtaining the nearest 15 arcmin
from the "0" mark (3 deg 30 arcmin in this example) and
adding the appropriate number of 5 arcmin intervals based upon where
the marks line up with the upper scale: 5 arcmin here. Thus the
telescope is pointing to 3 deg 35 arcmin in this example. For negative
decs the left side of the scale woold have been used.
Closing Check-list
- Turn off the guider and guider TV.
- Move the telescope to its storage position (declination= 30
degrees 6 hrs to the west).
- Install telescope covers on the finder, guider, and main telescope.
- If the rain is likely then:
- Close the lower clam shell.
- Move the telescope to zenith.
- Rotate the dome to due E.
- Using the ladder, carefully plug in the cord to the outlet marked "shutter".
- Flip the leftmost switch to the left to close the lower shutter.
- Once the lower shutter has begun closing it is safe to begin closing
the upper shutter. Flip the rightmost switch to the left.
If you can't move the switch, reach on top of the switch, and
slide the bar to the left.
- Once the sound of the lower shutter motion changes, it is completely
closed; turn off the switch.
- If the lower shutter cannot finish closing because the upper shutter
has come down too far, you must raise the upper shutter until it is
clear, finish closing the lower shutter, and then close the upper
shutter.
- Once the upper shutter is done closing, turn off its switch.
- Unplug and coil the cable.
- Turn the drive switch to "off".
- Turn off the key.
Table of contents
Last updated: October 6, 2002